Daily movement
Pilates Shoulder Bridge
An articulation exercise that targets spinal mobility, gluteal strength, and pelvic floor engagement.
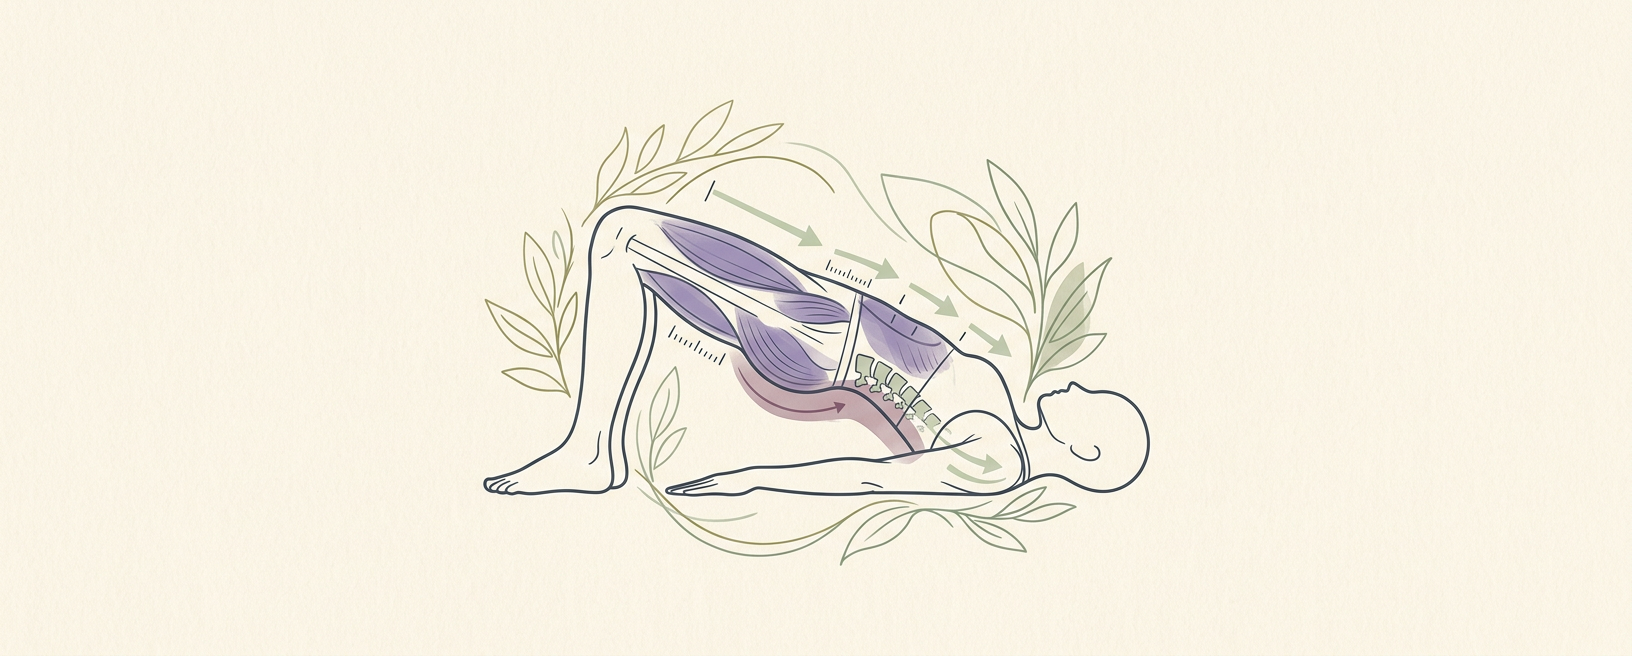
An articulation exercise that targets spinal mobility, gluteal strength, and pelvic floor engagement.
Classical Pilates (Joseph Pilates) · Joseph Pilates developed the Shoulder Bridge as part of his original Pilates repertoire. · This movement addresses foundational stability and mobility, particularly beneficial for individuals seeking to enhance body awareness, spinal articulation, and core control. It can alleviate low back tension and improve postural support. · Perform 6-10 repetitions, focusing on precision and spinal articulation. As proficiency increases, the duration of the hold at the top can be extended slightly, or repetitions can be added within the range of 10-12.
Why it works
The Shoulder Bridge systematically articulates the spine, segment by segment, which mobilizes the vertebrae and the surrounding soft tissues. This deliberate movement pattern stimulates mechanoreceptors along the spine, contributing to improved proprioception and refined motor control. Concurrently, the concentric and eccentric contractions of the gluteal muscles strengthen the posterior kinetic chain, supporting the pelvis. The coordinated activation of the transverse abdominis and pelvic floor muscles throughout the lift and lower phases integrates core stability and Breath regulation, optimizing intra-abdominal pressure management.
How to practice
Starting Position: Lie supine on a mat, knees bent, feet flat on the floor hip-width apart and a small distance from the buttocks. Arms are long by your sides, palms down. Ensure the spine is in a neutral position.
Inhale: Prepare by gently expanding the rib cage.
Exhale & Lift: As you exhale, initiate the movement by gently engaging the pelvic floor and lower abdominals. Begin to peel the spine off the mat, one vertebra at a time, starting from the tailbone. Continue to lift the hips until the body forms a straight line from the knees to the shoulders, avoiding hyperextension of the lower back. Maintain a sense of length through the spine.
Inhale (at top): Hold the bridge position for a brief inhale, maintaining stability and length.
Exhale & Lower: As you exhale, articulate the spine back down to the mat, one vertebra at a time. Focus on controlled, sequential lowering, placing each segment of the spine down individually, finishing with the tailbone. Maintain pelvic floor engagement throughout the descent.
Inhale (at bottom): Return to the starting neutral spine position.
Repeat: Continue the movement for the prescribed repetitions.
Starting Position: Lie supine on a mat, knees bent, feet flat on the floor hip-width apart and a small distance from the buttocks. Arms are long by your sides, palms down. Ensure the spine is in a neutral position.
Inhale: Prepare by gently expanding the rib cage.
Exhale & Lift: As you exhale, initiate the movement by gently engaging the pelvic floor and lower abdominals. Begin to peel the spine off the mat, one vertebra at a time, starting from the tailbone. Continue to lift the hips until the body forms a straight line from the knees to the shoulders, avoiding hyperextension of the lower back. Maintain a sense of length through the spine.
Inhale (at top): Hold the bridge position for a brief inhale, maintaining stability and length.
Exhale & Lower: As you exhale, articulate the spine back down to the mat, one vertebra at a time. Focus on controlled, sequential lowering, placing each segment of the spine down individually, finishing with the tailbone. Maintain pelvic floor engagement throughout the descent.
Inhale (at bottom): Return to the starting neutral spine position.
Repeat: Continue the movement for the prescribed repetitions.